
Klaviyo popups are a straightforward way to capture email subscribers, but the setup process involves several critical steps that can make or break your conversion rates. While Klaviyo offers basic popup functionality, many Shopify merchants discover limitations that impact their email capture performance.
This comprehensive guide walks you through creating Klaviyo popups step-by-step, plus reveals a superior alternative that's helping brands achieve 15–35% opt-in rates.
In this article, we will cover:
- A complete, click-by-click tutorial on setting up Klaviyo forms.
- The specific design and targeting settings that maximize conversions.
- How to integrate advanced AI tools to segment users based on quiz answers.
- Why top Shopify brands are upgrading to Alia for better results.
TL;DR
If you’re short on time, here is the quick checklist for high-converting popups:
- Design for Mobile First: Ensure buttons are at least 44x44px and touch targets are easily tappable.
- Trigger Smartly: Avoid immediate popups. Set triggers for 50–70% scroll depth or exit intent to capture engaged users.
- Keep Fields Minimal: Asking for just an email converts highest. If you need more data (like SMS), use a two-step form.
- Disable Double Opt-in: When integrating tools, ensure you switch to single opt-in to avoid asking users for consent twice.
- Consider the Upgrade: While Klaviyo handles basics, Alia integrates seamlessly to add AI-optimization and gamification, often tripling opt-in rates.
Klaviyo Popup Basics
Source: Klaviyo
Before diving into the creation process, it's essential to understand what Klaviyo popups can and cannot do. Klaviyo's signup forms include popups, embedded forms, and flyouts, with popups being the most visible option for capturing visitor attention.
However, these popups come with specific limitations around customization, targeting precision, and conversion optimization that many merchants encounter during implementation.
What Klaviyo popups include:
- Standard Form Types: Centered popups, flyouts (slide-ins), and embedded forms.
- Basic Triggers: Time delay, scroll percentage, and exit intent (desktop only).
- List Integration: Direct syncing to specific Klaviyo lists and segments.
Key limitations to be aware of:
- Static Logic: You cannot easily run continuous, automated A/B tests that self-optimize.
- Limited Gamification: No native "spin-to-win" or interactive educational flows without custom coding.
- Mobile Rigidity: Adapting complex designs for mobile often requires manual CSS tweaking.
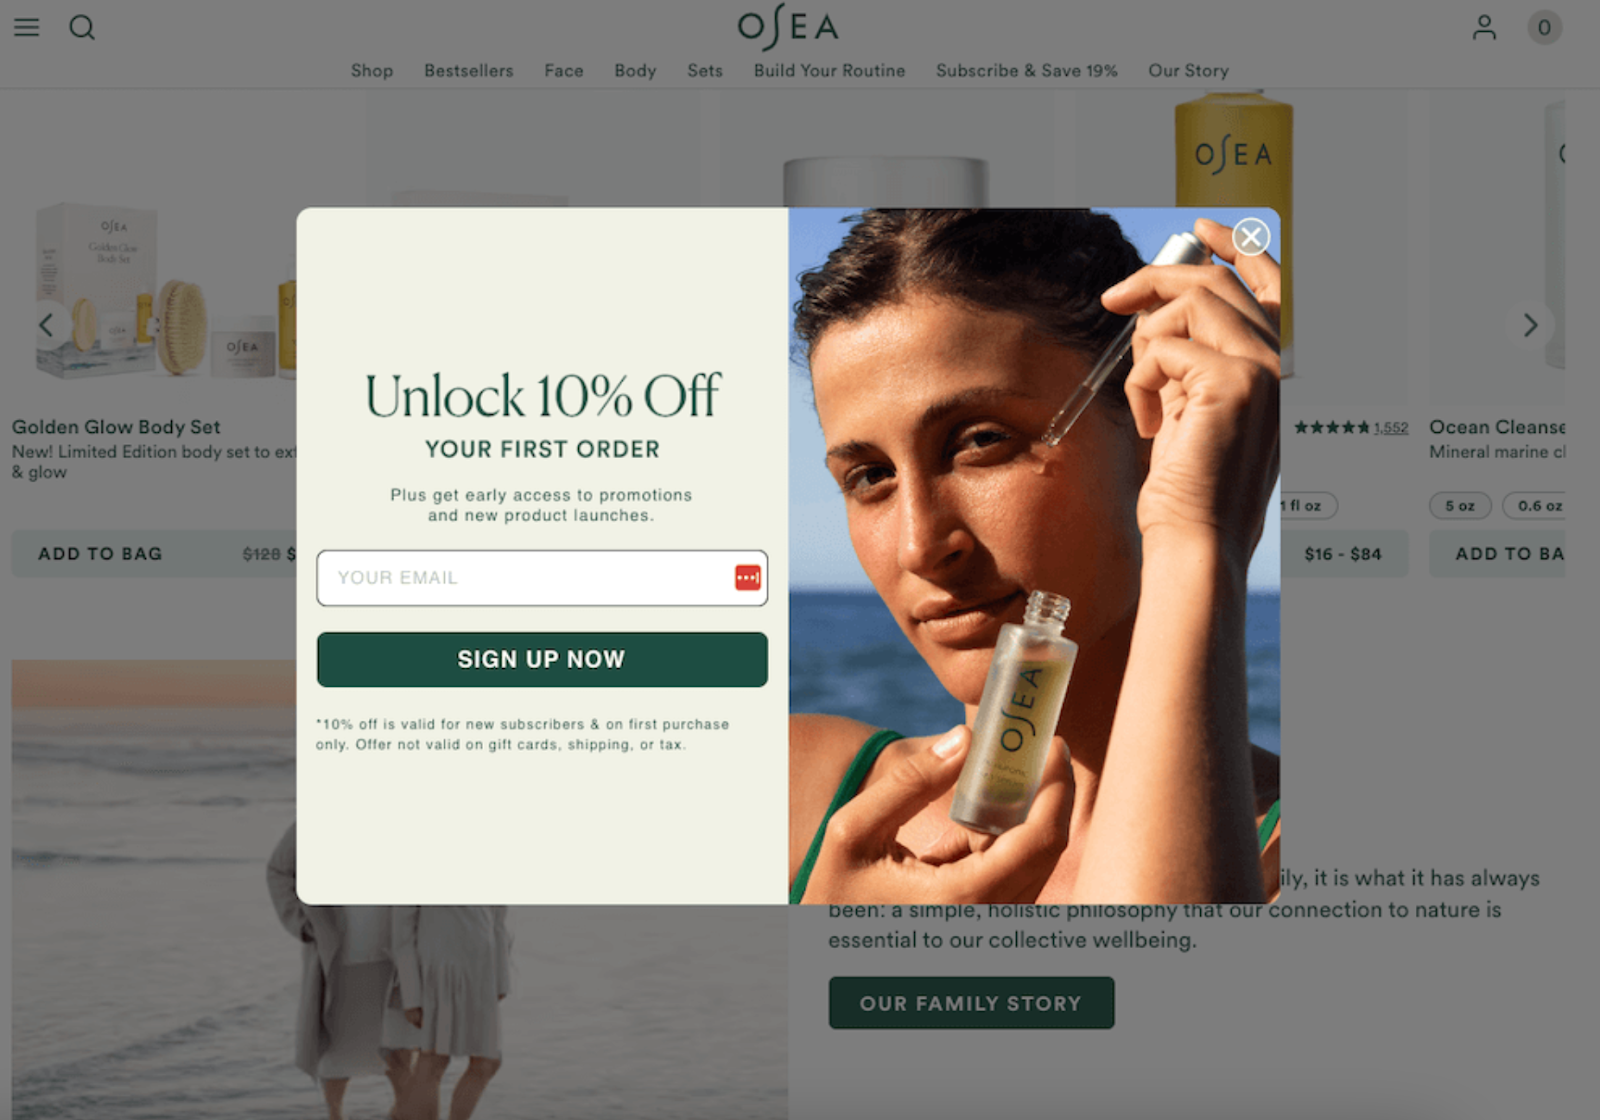
When Klaviyo popups make sense: If you are just launching a store and need a simple, "good enough" solution to capture emails without extra cost, Klaviyo’s built-in forms are a solid starting point. However, as you scale, the lack of advanced features often leads to a plateau in list growth.
Why Top Brands Upgrade: Klaviyo vs. Alia

While Klaviyo is a world-class Email Service Provider (ESP), its popup builder is a secondary tool designed for basic data capture. For brands looking to scale, Alia provides a dedicated conversion engine that uses AI to solve Klaviyo's native limitations.
Quick Comparison: Native vs. Advanced Popups
The Alia Solution: Bridging the Gaps
Alia transforms the signup process from a friction point into a personalized brand experience.
- Education Over Interruption: Instead of a generic "10% off" popup, Alia uses storytelling to educate users (e.g., "Learn why our fabric is different") before asking for an email. This leads to 2–3x higher purchase intent.
- Solving the Mobile Gap: While Klaviyo images often push content off-screen on mobile, Alia is built mobile-first, ensuring your opt-in rates stay high for the 70%+ of traffic coming from phones.
- Hyper-Personalization via Zero-Party Data: Alia captures specific preferences (e.g., "Dry Skin" vs. "Oily Skin") through interactive polls. This data flows instantly into Klaviyo, allowing you to trigger highly relevant email flows that convert at a much higher rate.
Read more: Maximizing Conversions with the Alia and Klaviyo Integration
Case Study: Nakie's 600% Improvement Over Klaviyo
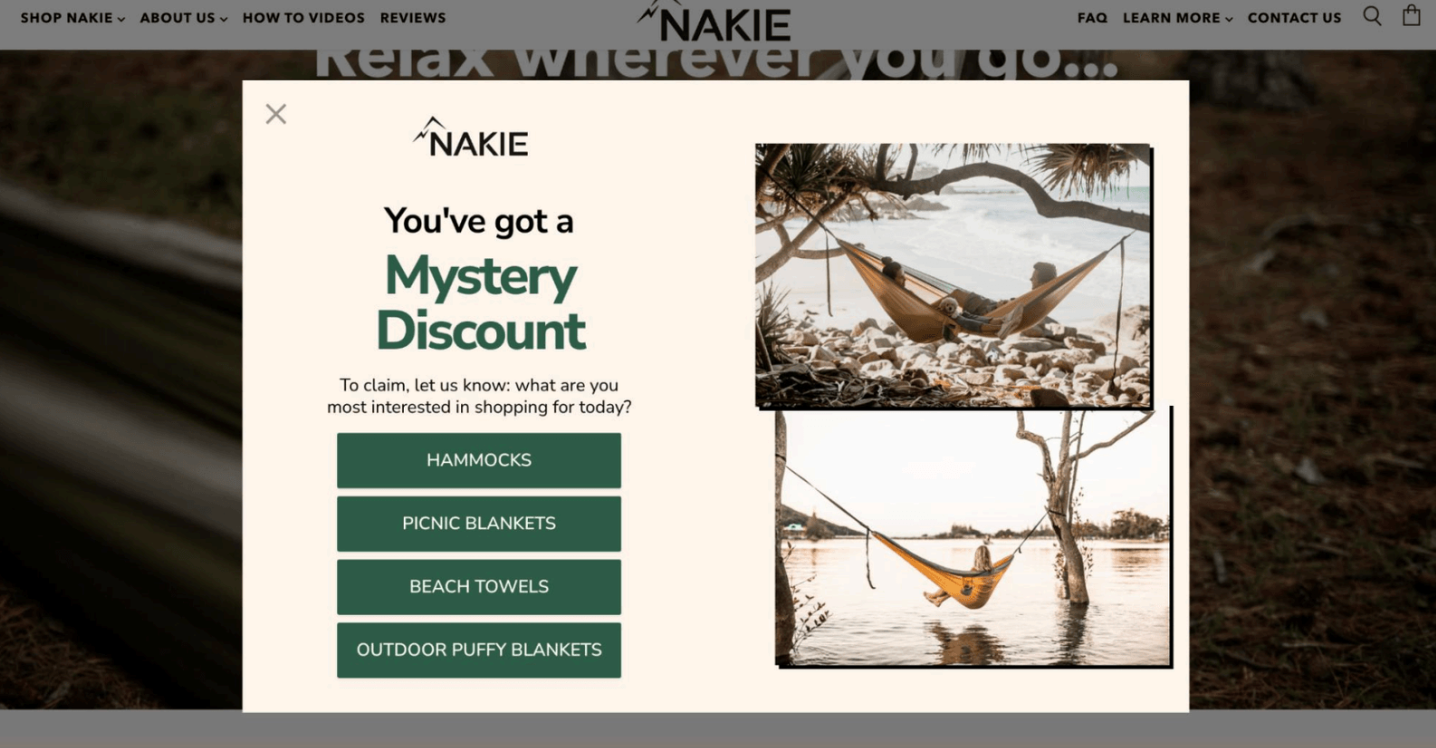
Nakie, a sustainable outdoor gear brand, was spending $2M+ monthly on paid media but was stuck with 5–6% opt-in rates using Klaviyo's rigid popup format. Their static "10% off" offers couldn't segment subscribers or tell their sustainability story effectively.
After switching to Alia, they achieved:
- Email opt-in rate: Increased to an average of 28%, peaking at 35%.
- Purchase rate after signup: 24% (significantly higher than their previous baseline).
- Revenue: $5.8M+ in attributed sales from Alia-driven flows.
- Segmentation: They used Alia to ask users about interests (e.g., "Beach hammock" vs. "Picnic blanket") and fed that data into Klaviyo for hyper-relevant follow-up emails.
Curious how other brands are winning with advanced popups? See more success stories on how 7–9 figure brands quietly scale with Alia that might spark your next breakthrough.
Step-by-Step Klaviyo Popup Creation Process
Creating a Klaviyo popup involves navigating their signup form builder and configuring multiple settings for optimal performance.
The process requires attention to design elements, targeting rules, and integration details that directly impact your email capture success. Here's the complete walkthrough with specific settings and best practices for each step.
Step 1: Access the Klaviyo Popup Builder
- Log in to your Klaviyo account.
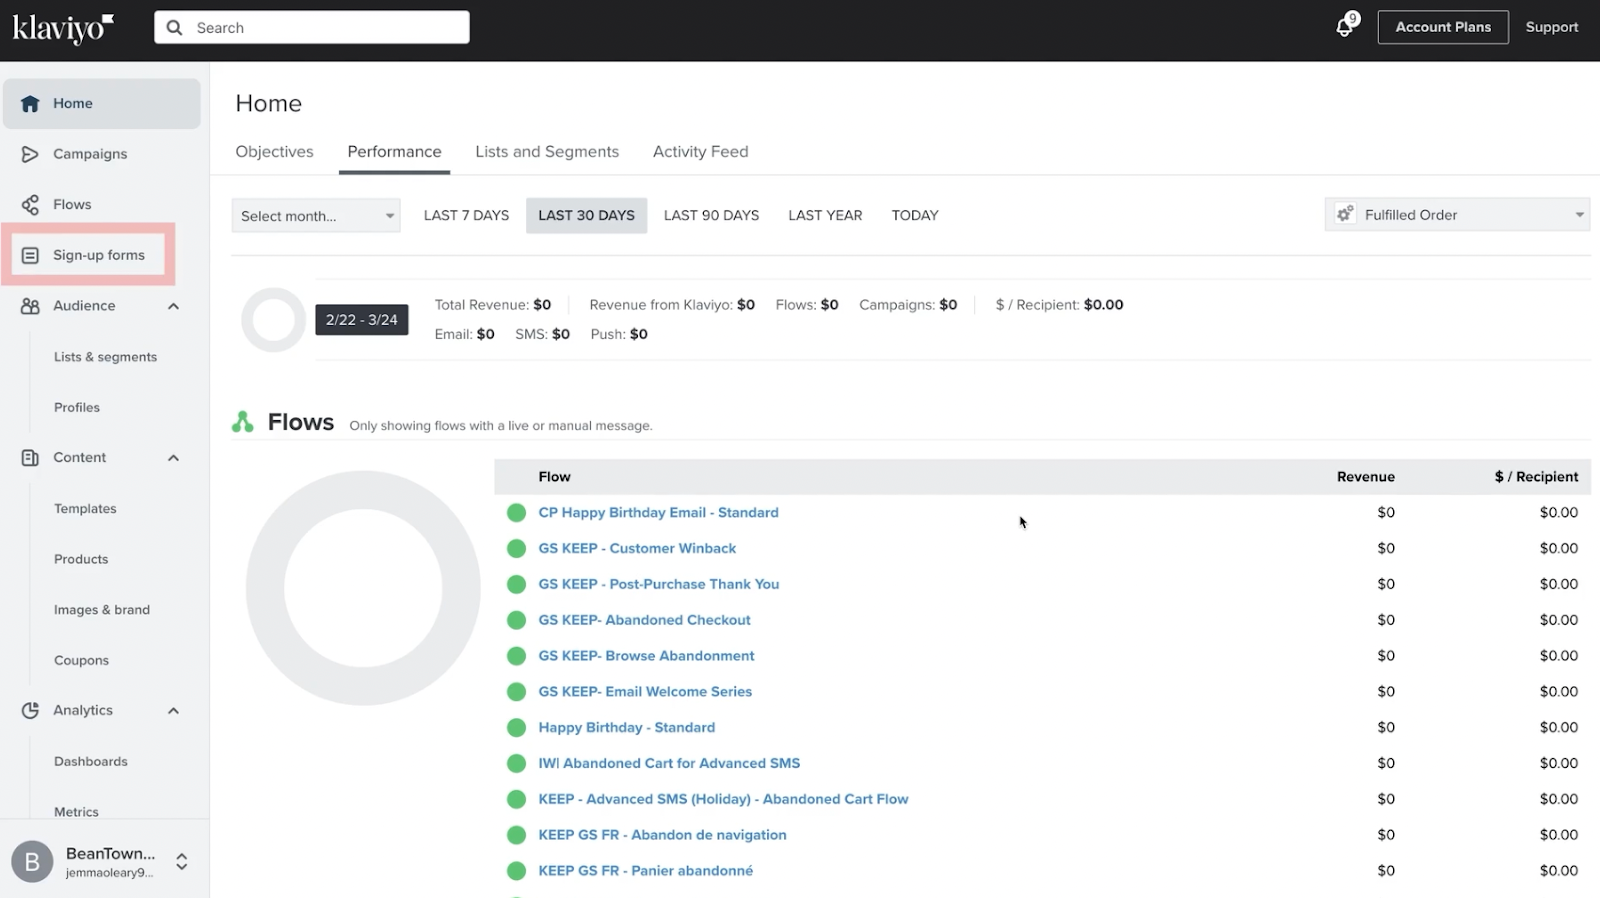
- Navigate to Signup Forms in the left-hand menu.
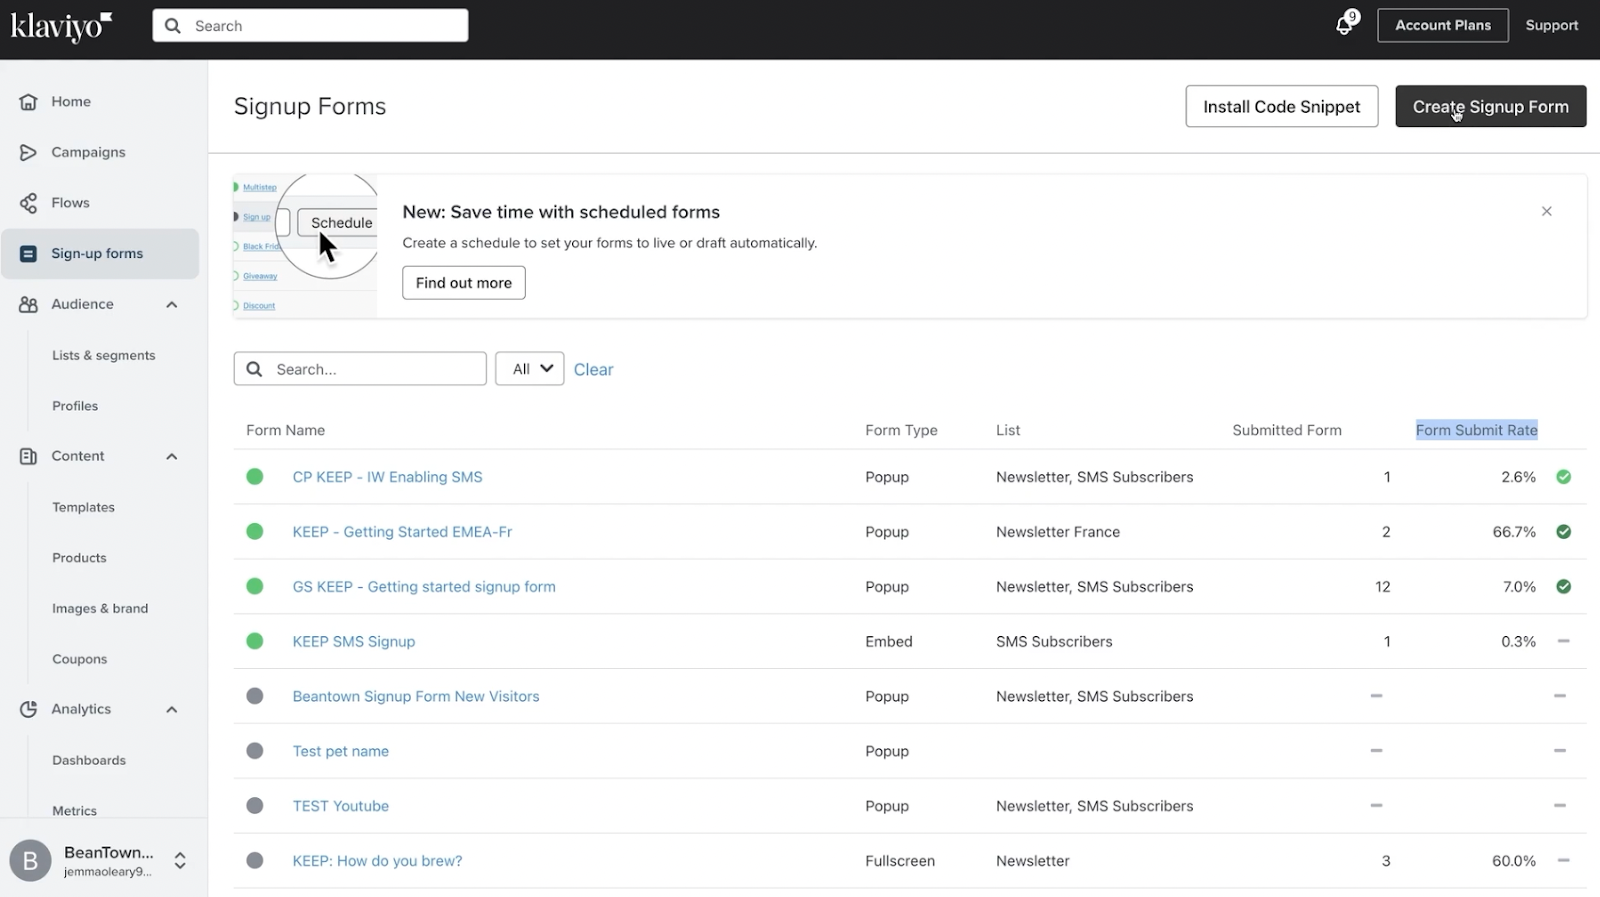
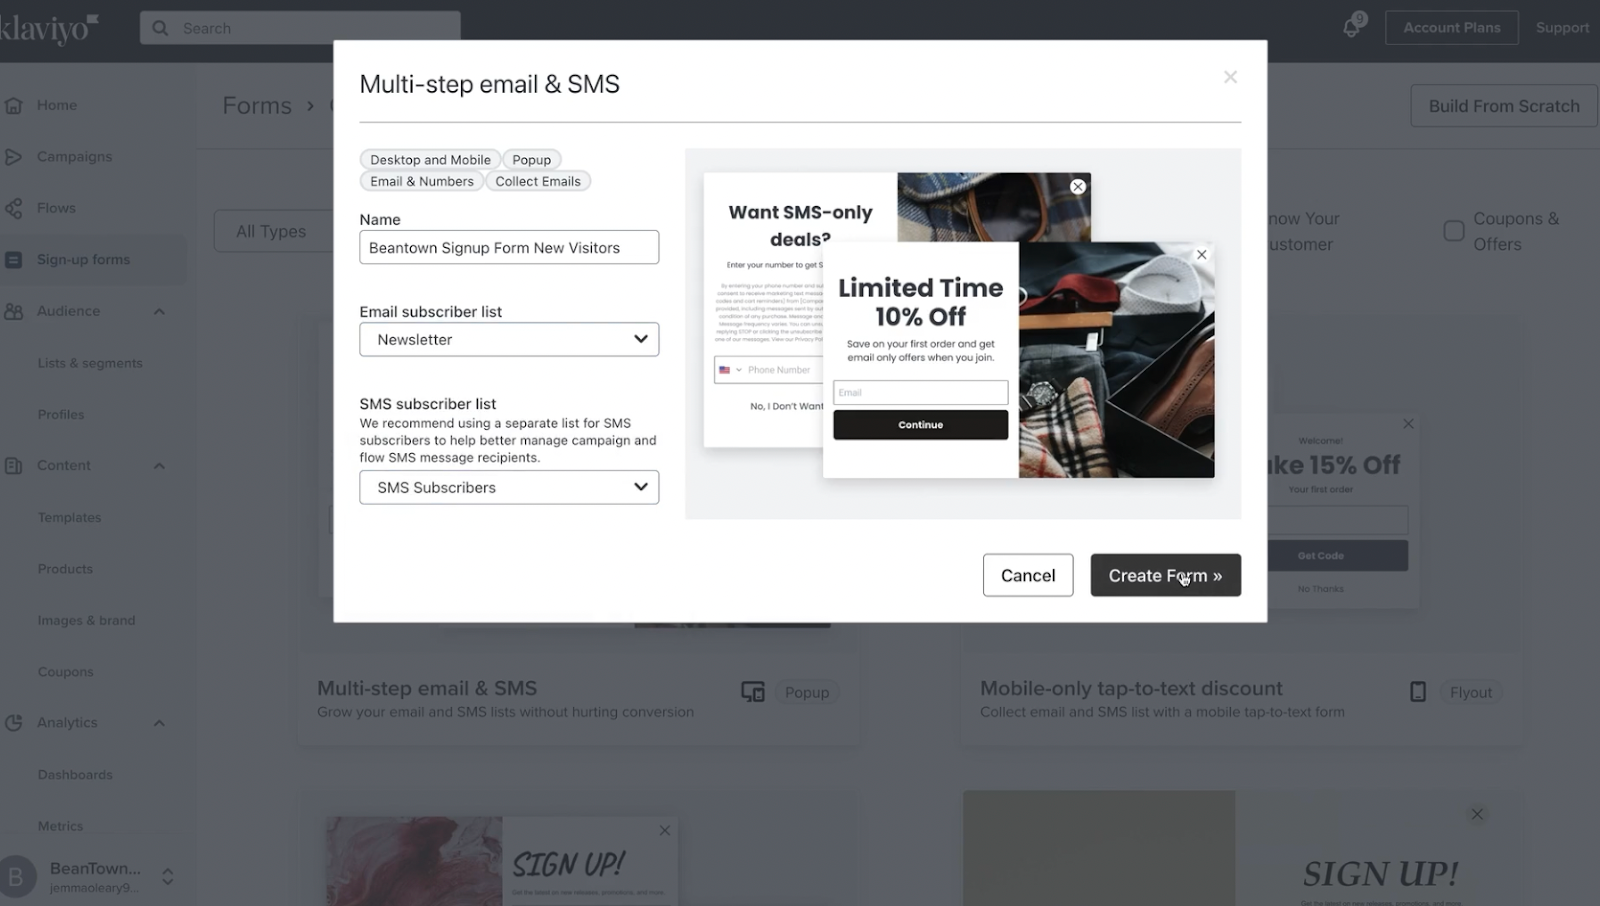
- You will be presented with a library of templates. You can filter by "Popup," "Flyout," or "Embed." Click the Create Signup Form button in the top right corner.
- Select a template that closely matches your brand's layout needs, or choose "Build from scratch" if you have a specific design in mind.
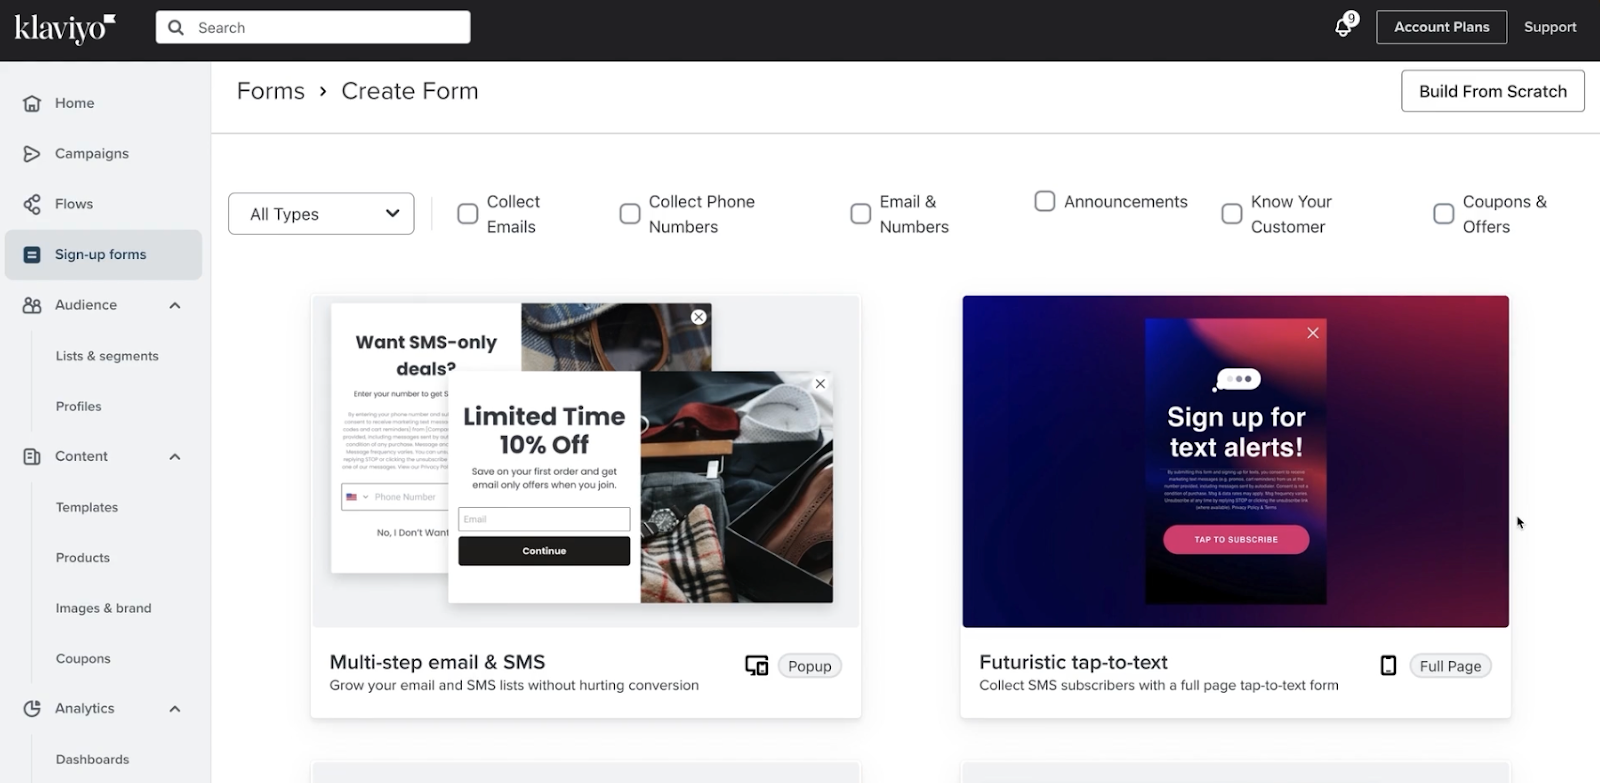
- Name your form (e.g., "Homepage - New Visitor - 10% Off") and select the Subscriber List where new leads should be added (usually "Newsletter" or "New Subscribers").
Step 2: Design Your Popup Layout
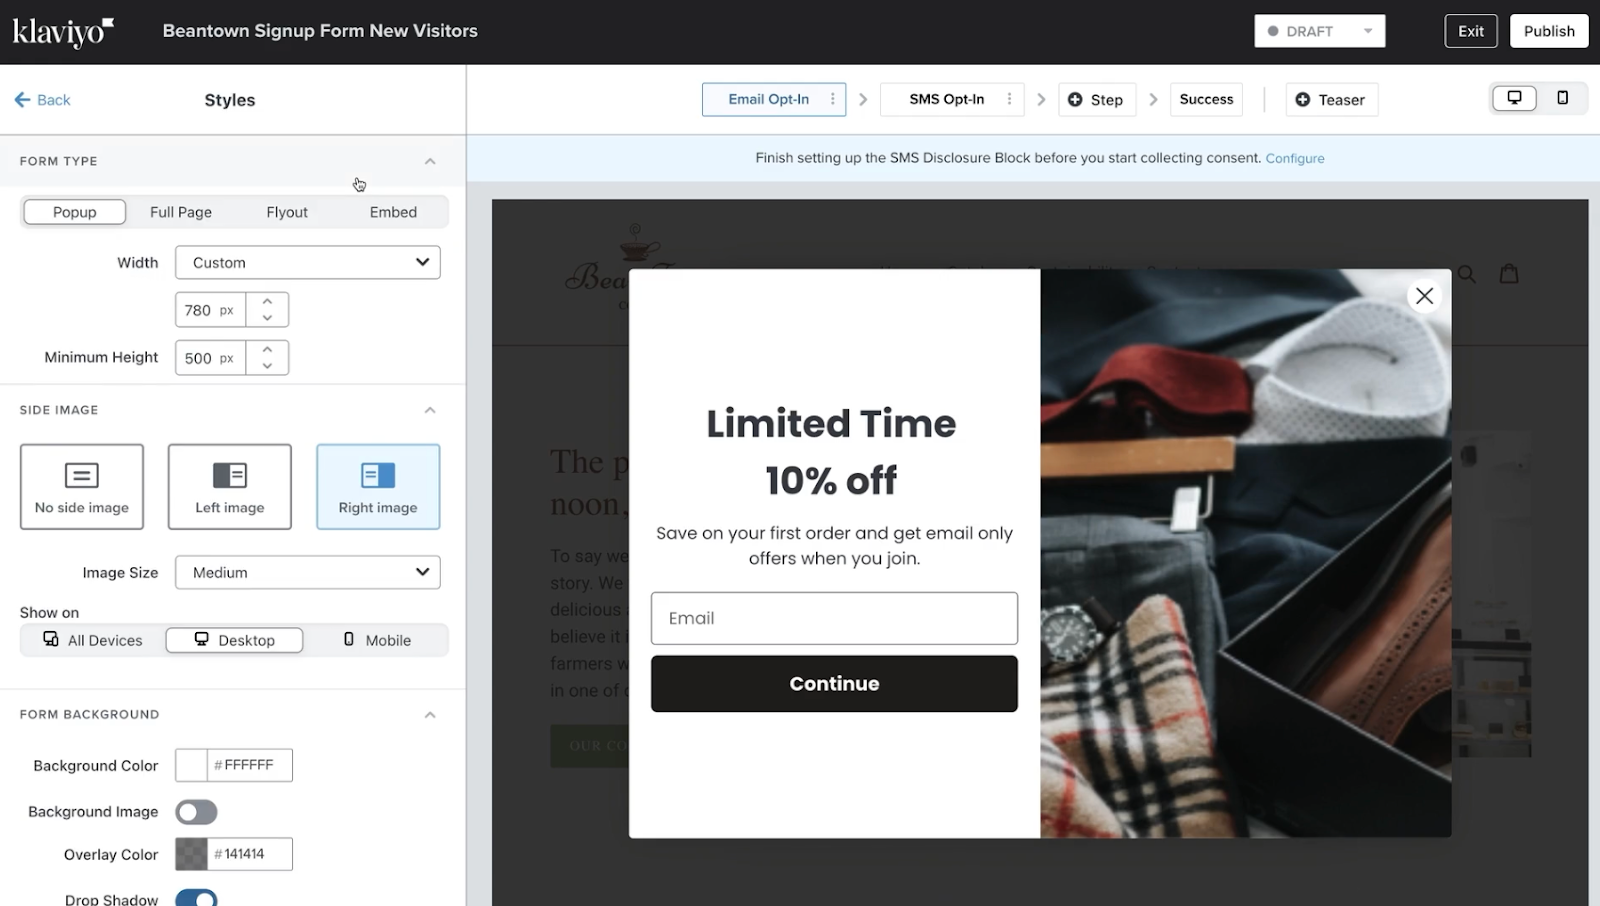
Once inside the editor, you have drag-and-drop functionality to customize the look and feel.
Text Blocks:
- Keep headlines punchy. Use a font size of 24–32px for headers to ensure they grab attention.
- Body text should be at least 16–18px for readability on all devices.
Images:
- High-quality imagery builds trust. Use an image size around 300x200px for balanced layouts.
- Pro Tip: On mobile, large images push the submit button "below the fold." Use the "Show on Desktop Only" setting for large side images to keep the mobile view clean.
CTA Buttons:
- This is the most critical element. Make your button width full-width or at least 250px wide.
- Ensure the button height is at least 44px to meet mobile accessibility standards (making it easy to tap with a thumb).
- Use a high-contrast color that stands out from the background.
Brand Customization:
- Colors: Input your exact brand Hex codes in the "Styles" tab. Do not "eyeball" the colors.
- Fonts: Klaviyo allows you to add Google Fonts or Adobe Fonts. Stick to 2 font families maximum (one for headers, one for body) to keep load times fast and design cohesive.
Step 3: Configure Form Fields and Targeting Rules
The effectiveness of your popup depends on two factors: what you ask for and when you ask for it. While Klaviyo offers foundational tools for both, success lies in reducing friction while maintaining relevance.
1. Strategic Field Configuration
The more fields you add, the lower your conversion rate will be. Use the table below to decide which data points are truly worth the "cost" of a lost subscriber.
Pro Tip: The Multi-Step Workaround To collect SMS numbers without tanking your email signup rate, use a Multi-Step Form. Capture the email on Step 1 (e.g., "Get 10% Off"), then ask for the phone number on Step 2 (e.g., "Upgrade to 15% Off"). This ensures you keep the email lead even if they skip the SMS step.
2. Display Rules & Timing
Proper timing can improve opt-in rates by 40–60% compared to immediate popups. Use these triggers to catch users when they are most engaged:
3. Frequency Controls
Don't "stalk" your visitors. If a user closes the popup without signing up, set the "Show again after" rule to at least 7 days. If they do sign up, ensure the form is set to never show again to maintain a clean user experience.
Step 4: Integration and Publishing Setup
The final step involves connecting your popup to your website and email lists, ensuring proper data flow and subscriber management.
Klaviyo requires their tracking code to be installed on your site, and the integration process can vary depending on your platform. Proper integration is crucial—mistakes here can result in lost subscribers or broken email flows.
- Install Tracking Code: If you are on Shopify, the Klaviyo app usually handles this. Verify it by checking your theme code for klaviyo.js.
- Connect to List: Double-check that the form is connected to the correct List ID.
- Success Message: Configure the "Success" step. You can show a simple "Check your email!" message or reveal the discount code immediately (recommended for higher conversion).
- Publish: Click Publish in the top right.
- Test: Open your site in an Incognito/Private window to verify the popup triggers correctly.
Seamless Klaviyo Integration with Enhanced Performance
The beauty of Alia is that it enhances rather than replaces your Klaviyo setup. Alia integrates directly with Klaviyo to pass subscriber data and zero-party insights, creating more sophisticated email segmentation than Klaviyo popups alone can provide.
Integration Benefits:
- Automatic Data Sync: All Alia signups flow directly into your Klaviyo lists with custom properties (e.g., "Skin Type: Oily").
- Enhanced Segmentation: You can build Klaviyo segments based on the quiz answers collected in Alia.
- Revenue Attribution: Track exactly how much revenue your popups are generating directly inside your dashboard.
Implementation Guide: How to Integrate Alia with Klaviyo
Integrating Alia with Klaviyo only takes a few minutes. Once enabled, Alia sends all user data—including contact info and quiz answers—automatically to your Klaviyo account. This allows you to maintain your existing email flows while supercharging your list growth with Alia’s interactive popups.
Step 1: Create Your Klaviyo API Key
To get started, you need to generate a specific key that allows Alia to talk to your Klaviyo account.
- Sign into Klaviyo and navigate to Settings → API Keys.
- Click Create API Key.
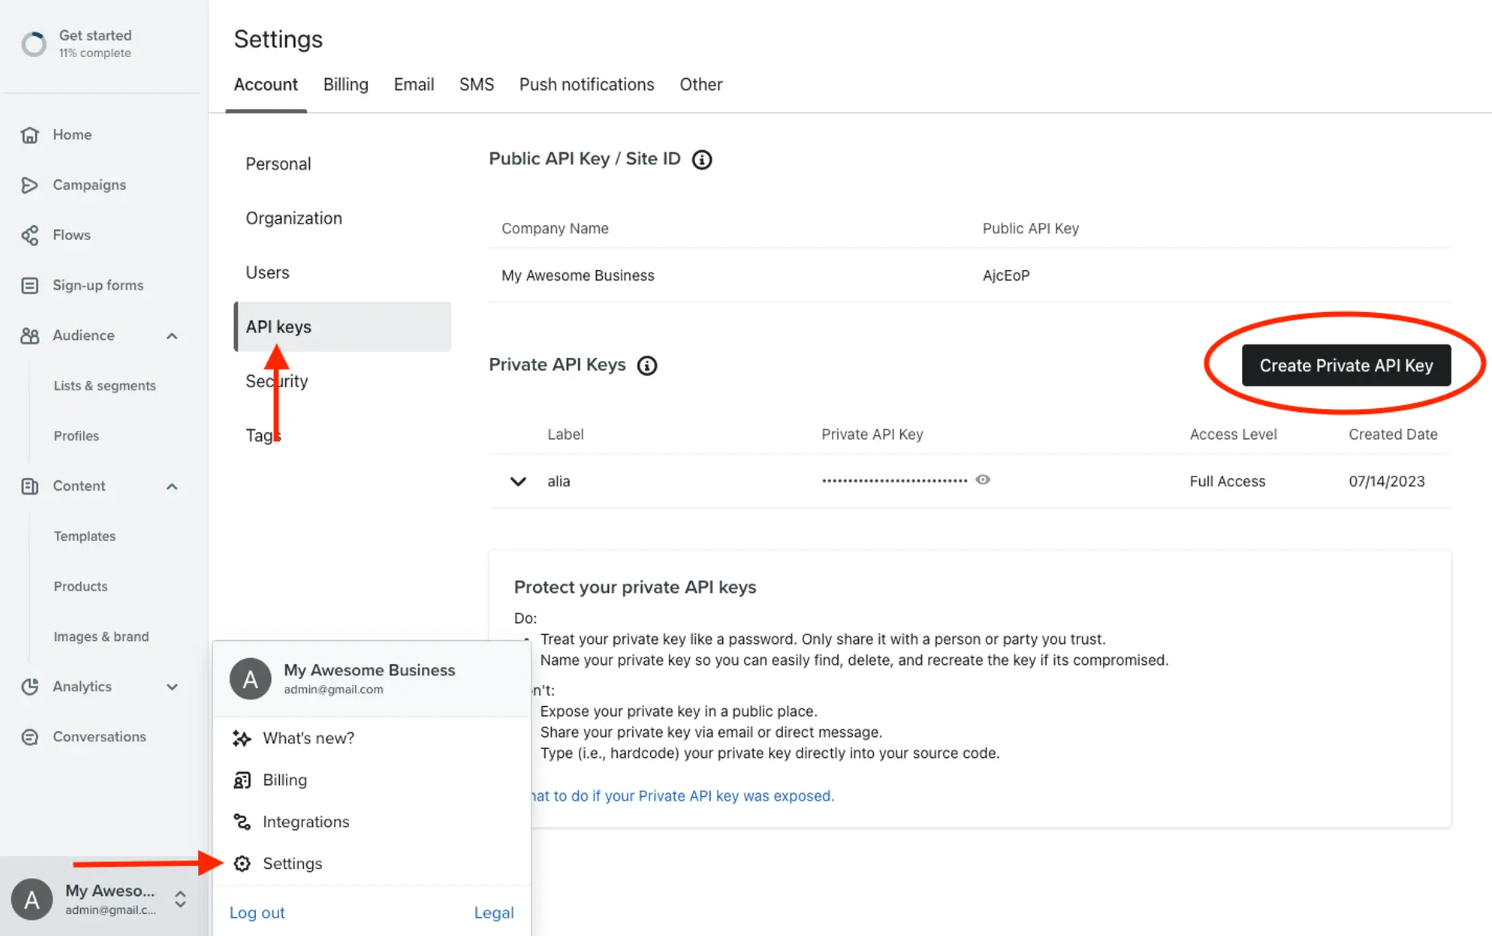
- Name your key "alia" (or anything recognizable).
- Under Select Access Level, select Full Access.
- Note: Alia needs full access to add profiles and create lists. It will never delete or modify your existing data.
- Click Create in the top right.
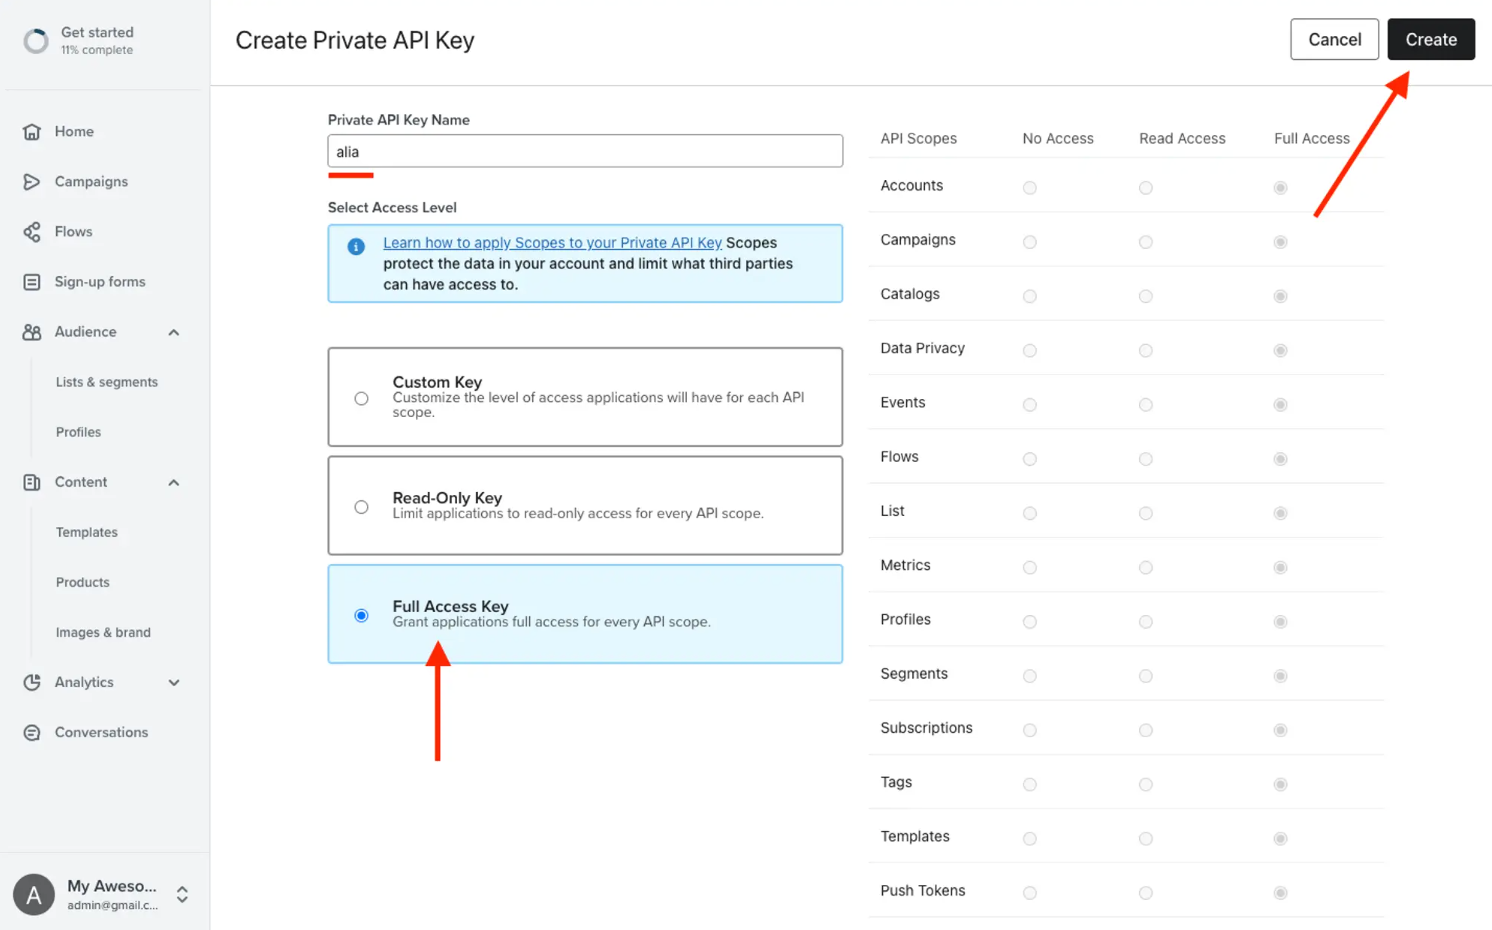
- Copy the generated key immediately.
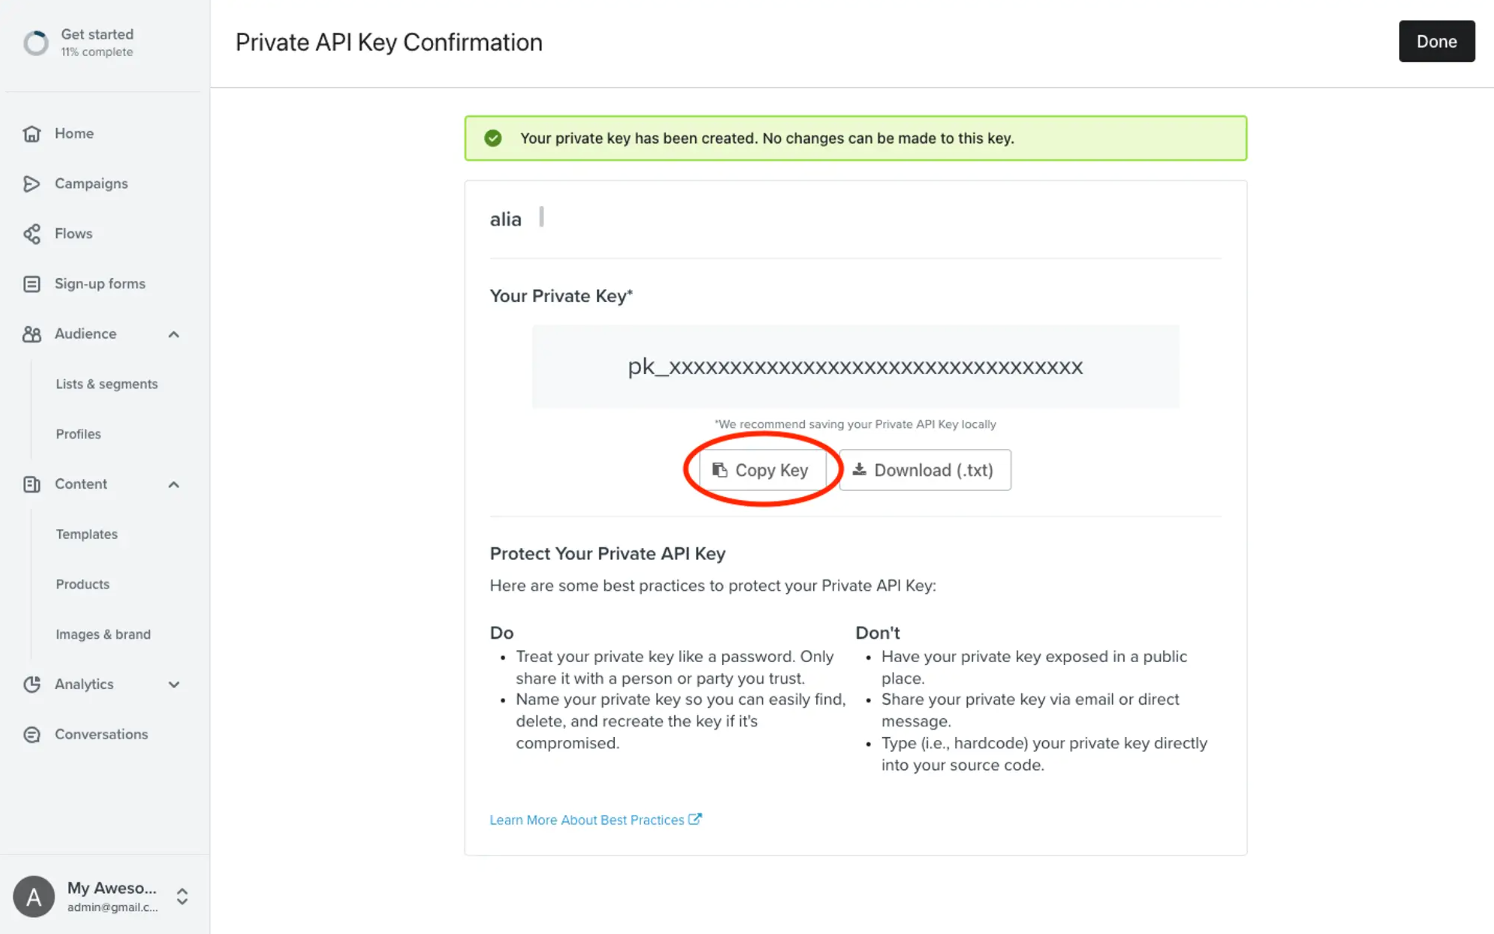
Step 2: Enable the Integration in Your Alia Dashboard
Now that you have the key, you need to paste it into Alia.
- From your Shopify Admin, open the Alia app dashboard.
- Navigate to the Integrations page. Find Klaviyo and click the green Connect button.

- A dialog box will open. Paste the API key you just copied into the text box and click Save.
- Alia will validate the key. If you get an error, double-check that you selected "Full Access" in step 1.
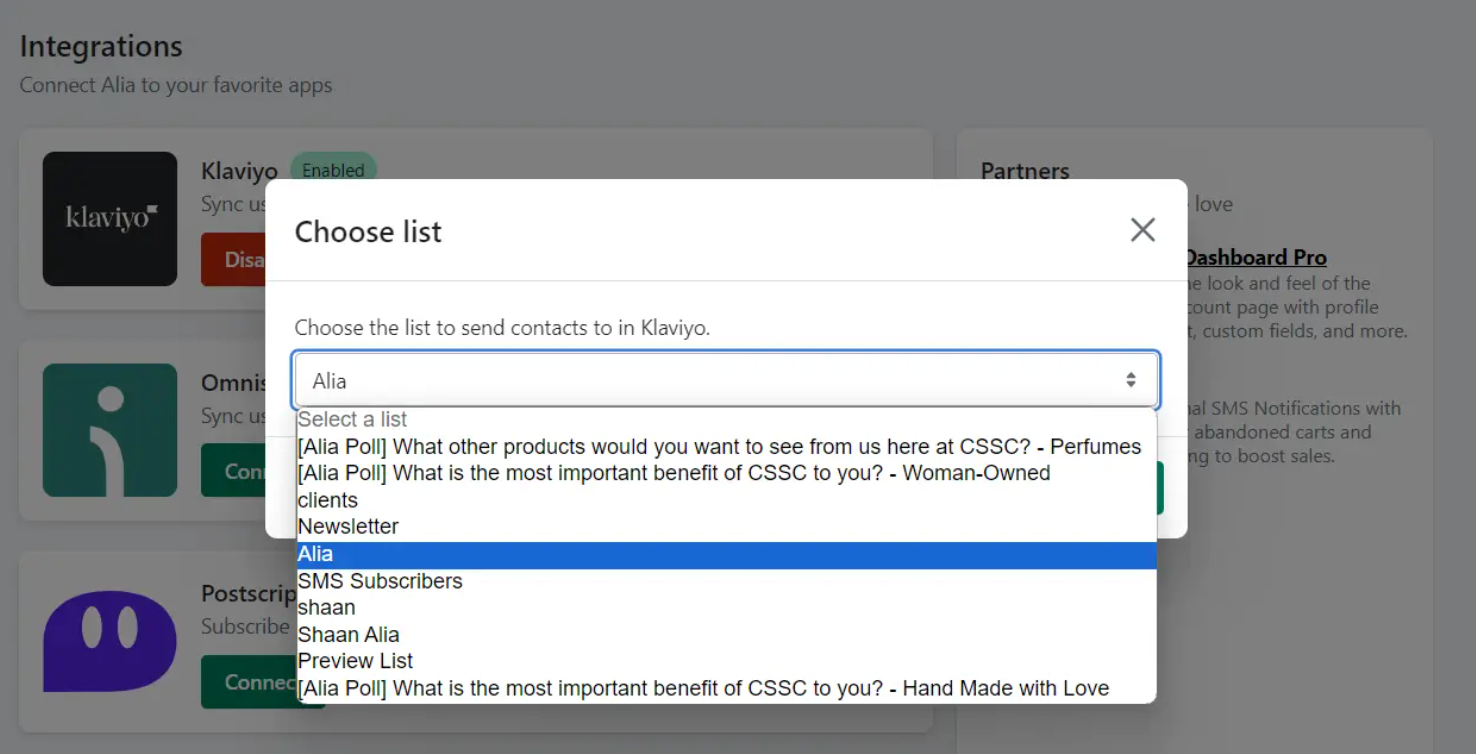
Step 3: Select Your List and Disable Double Opt-in
Once connected, you need to tell Alia where to send the new subscribers.
- Select a List: A dropdown will appear asking which list to use.
- Option A (Simplest): Select your existing "Newsletter" or "Master" list. This ensures your current Welcome Series flows trigger automatically for new Alia signups.
- Option B (Segmented): Create a new list in Klaviyo called "Alia" and select that. This is useful if you want to keep these leads separate initially.
- Disable Double Opt-in (Crucial Step):
- Go back to your Klaviyo dashboard.
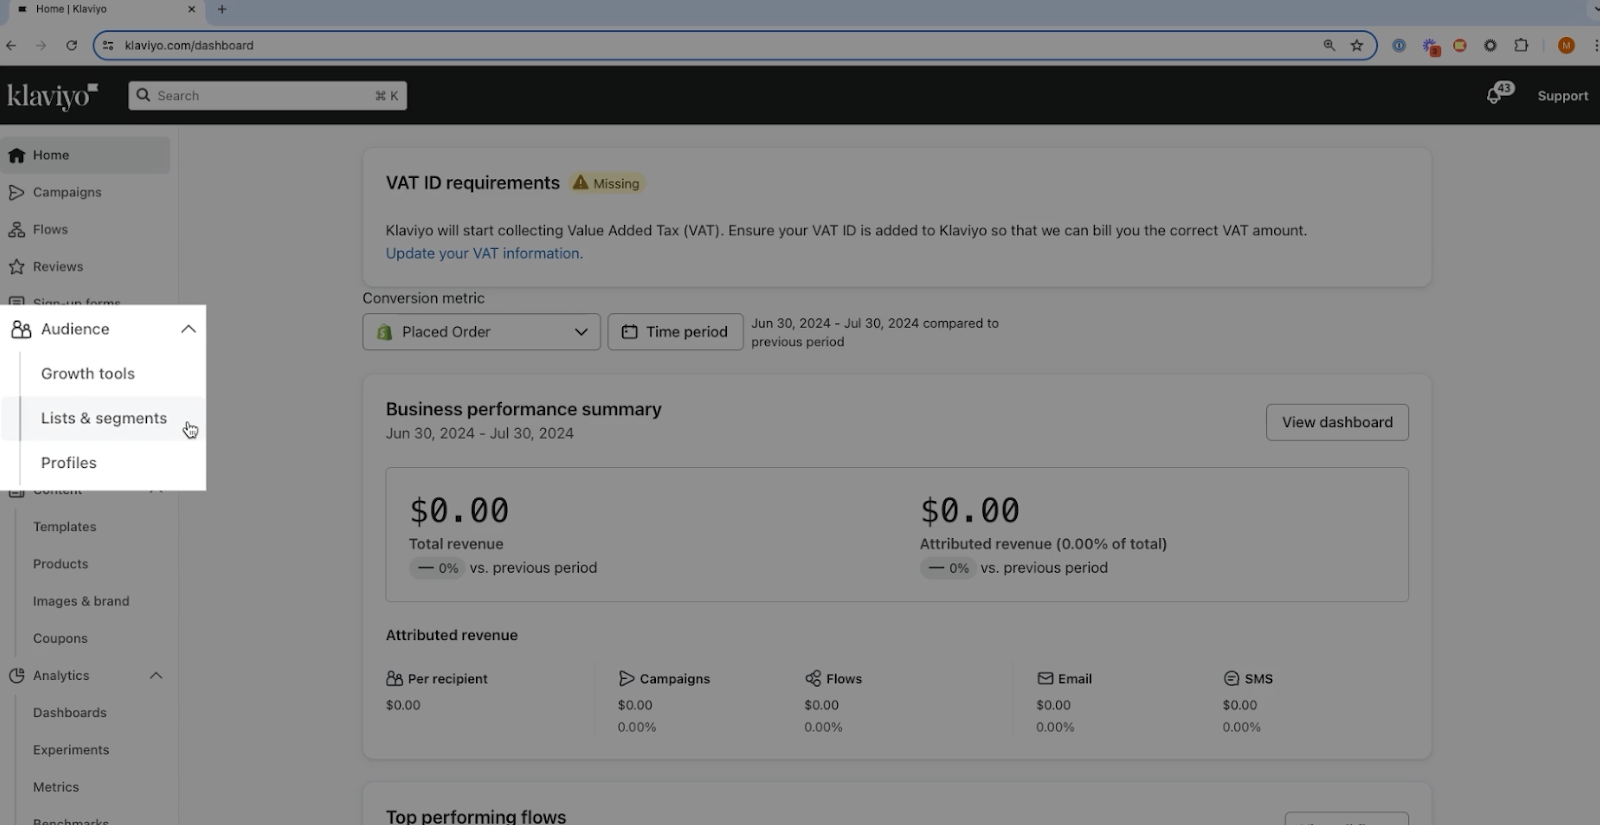
- Navigate to Audience → Lists & Segments.
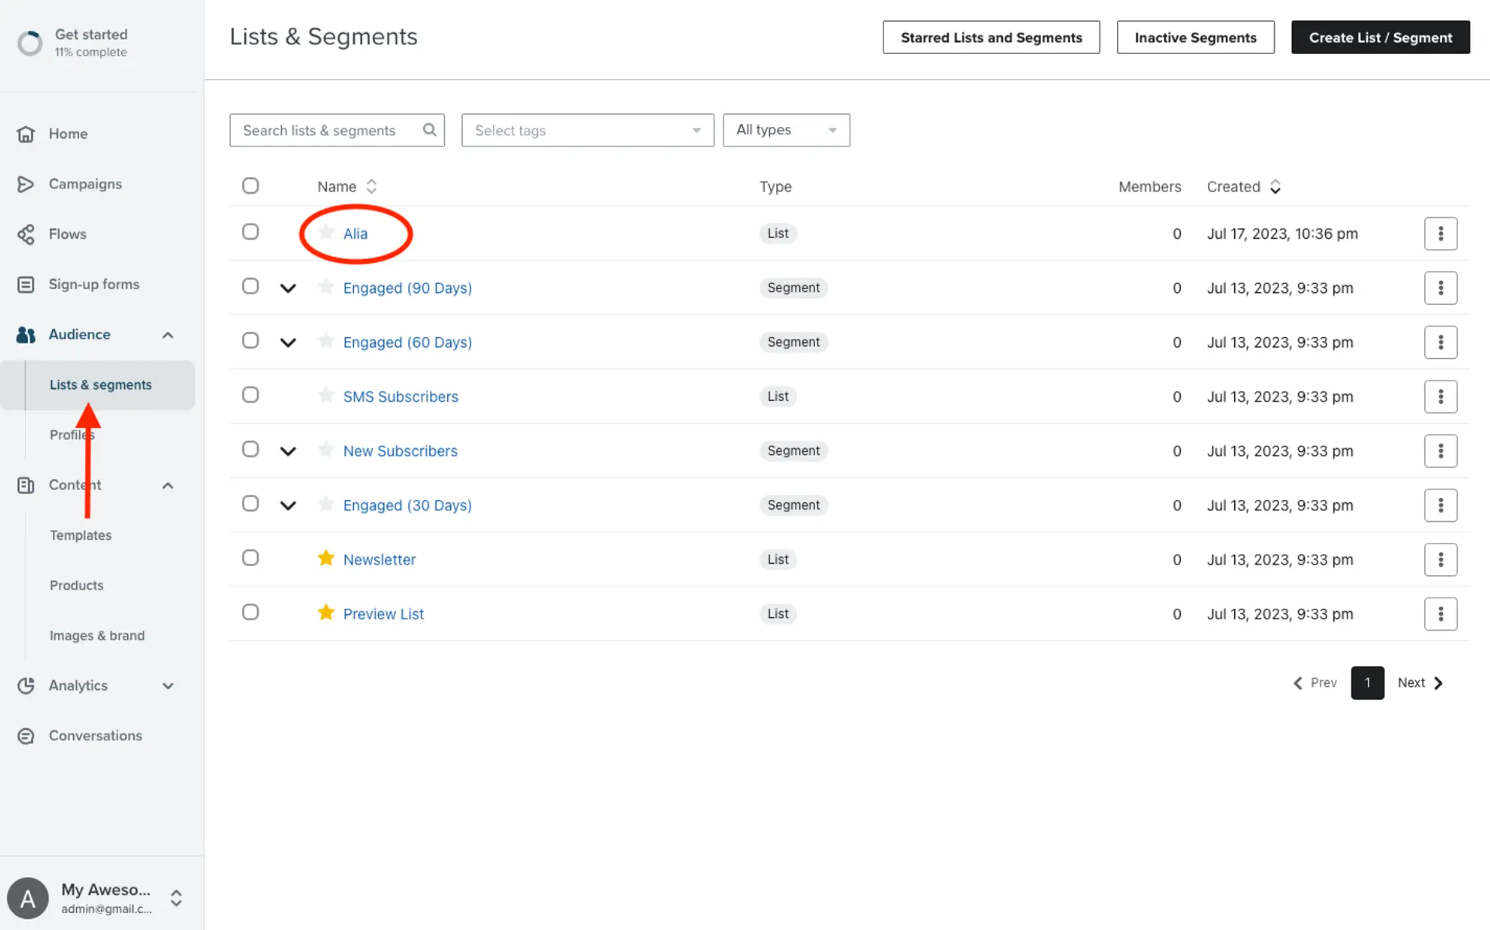
- Select the list you chose in the previous step (e.g., "Newsletter" or "Alia").
- Click the Settings tab at the top and select Consent.
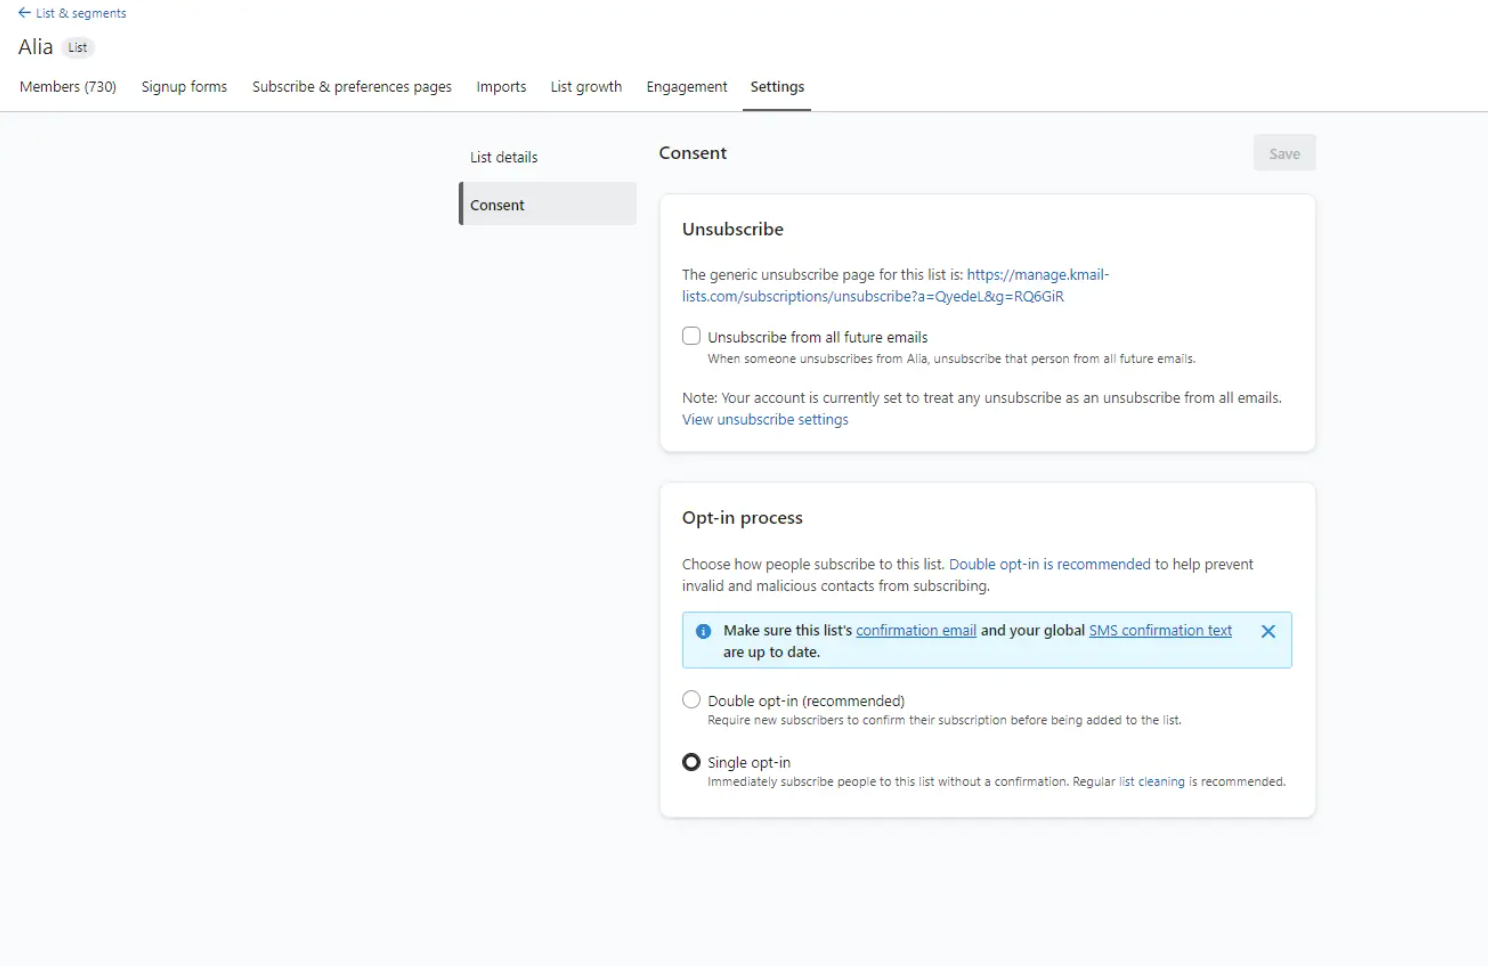
- Under Opt-in Process, select Single opt-in.
- Click Save.
Why is this important? Alia already asks for consent when users provide their information.
If you leave double opt-in enabled, users will have to confirm their subscription again via email, which drastically lowers your effective signup rate. Enabling single opt-in ensures immediate subscription.
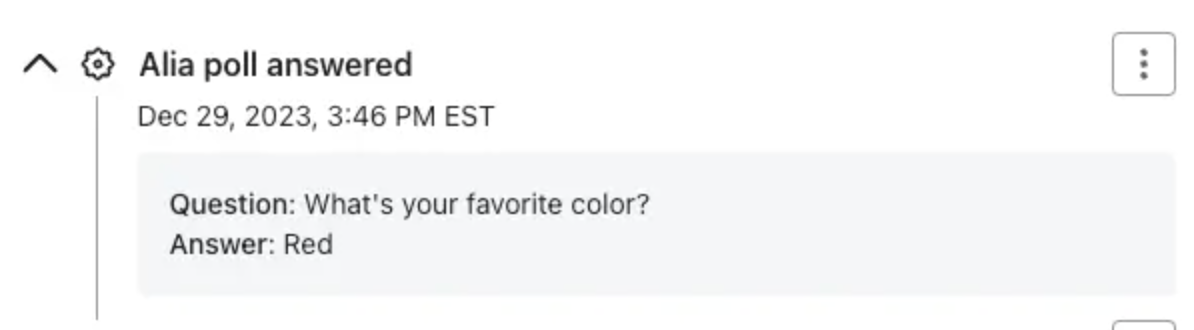
Step 4: Segmenting Leads Based on Poll Answers
One of the most powerful features of the Alia-Klaviyo integration is the ability to segment users based on their quiz answers.
When a user answers a poll question in an Alia lesson (e.g., "What is your favorite color?"), Alia automatically creates an event in Klaviyo called "Alia poll answered". This event contains the question and the specific answer the user chose.
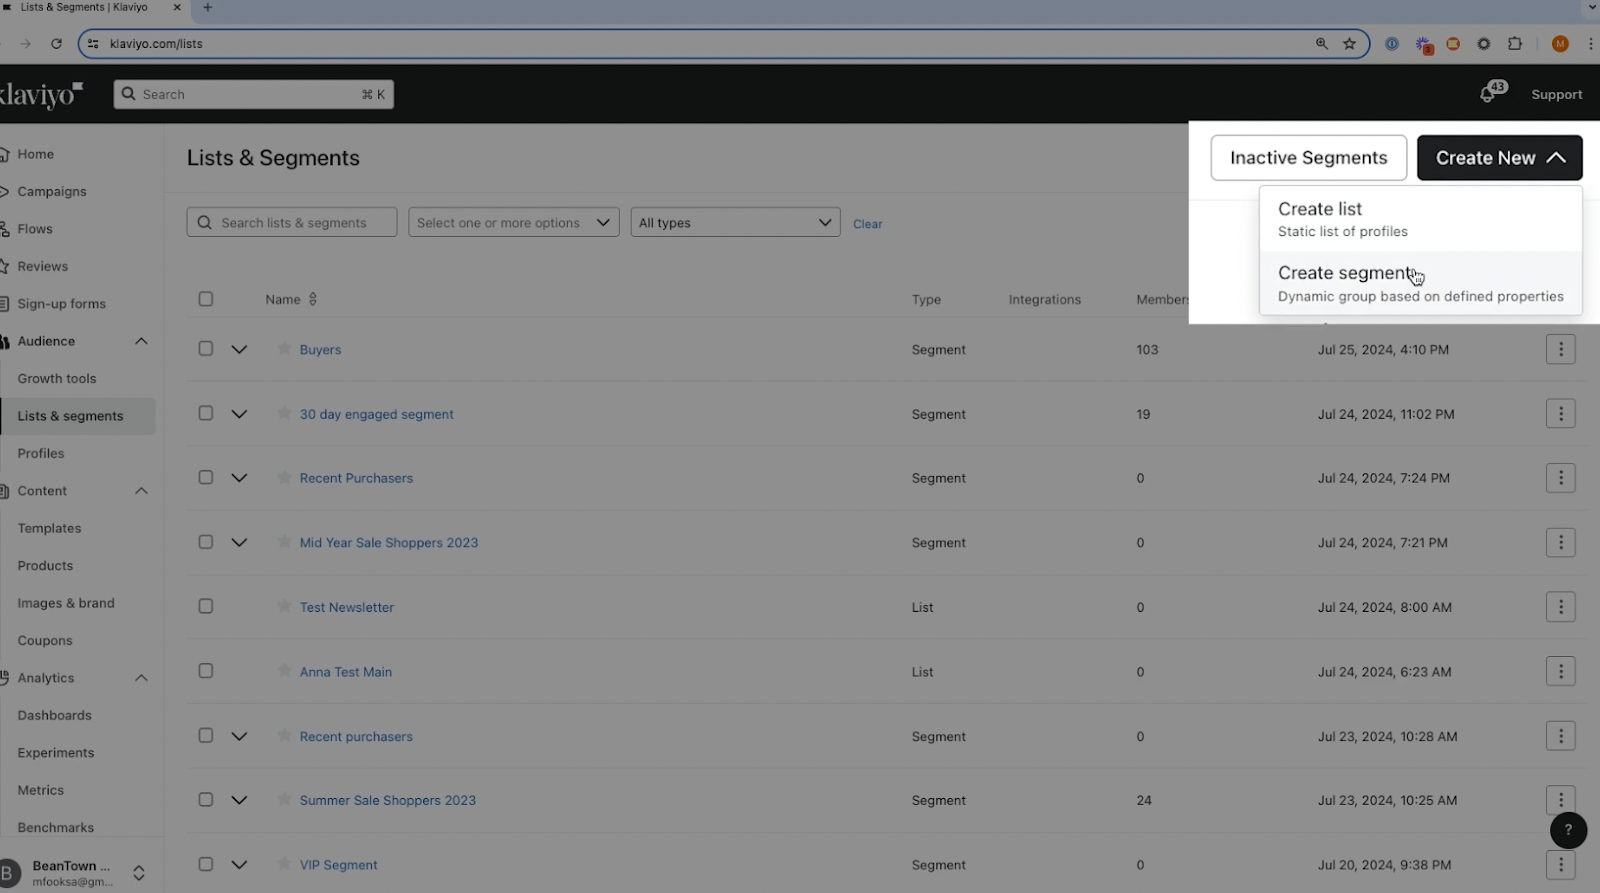
How to create a segment:
- Go to Lists & Segments in Klaviyo.
- Click Create List/Segment → Segment.
- Define the segment using "What someone has done (or not done)".
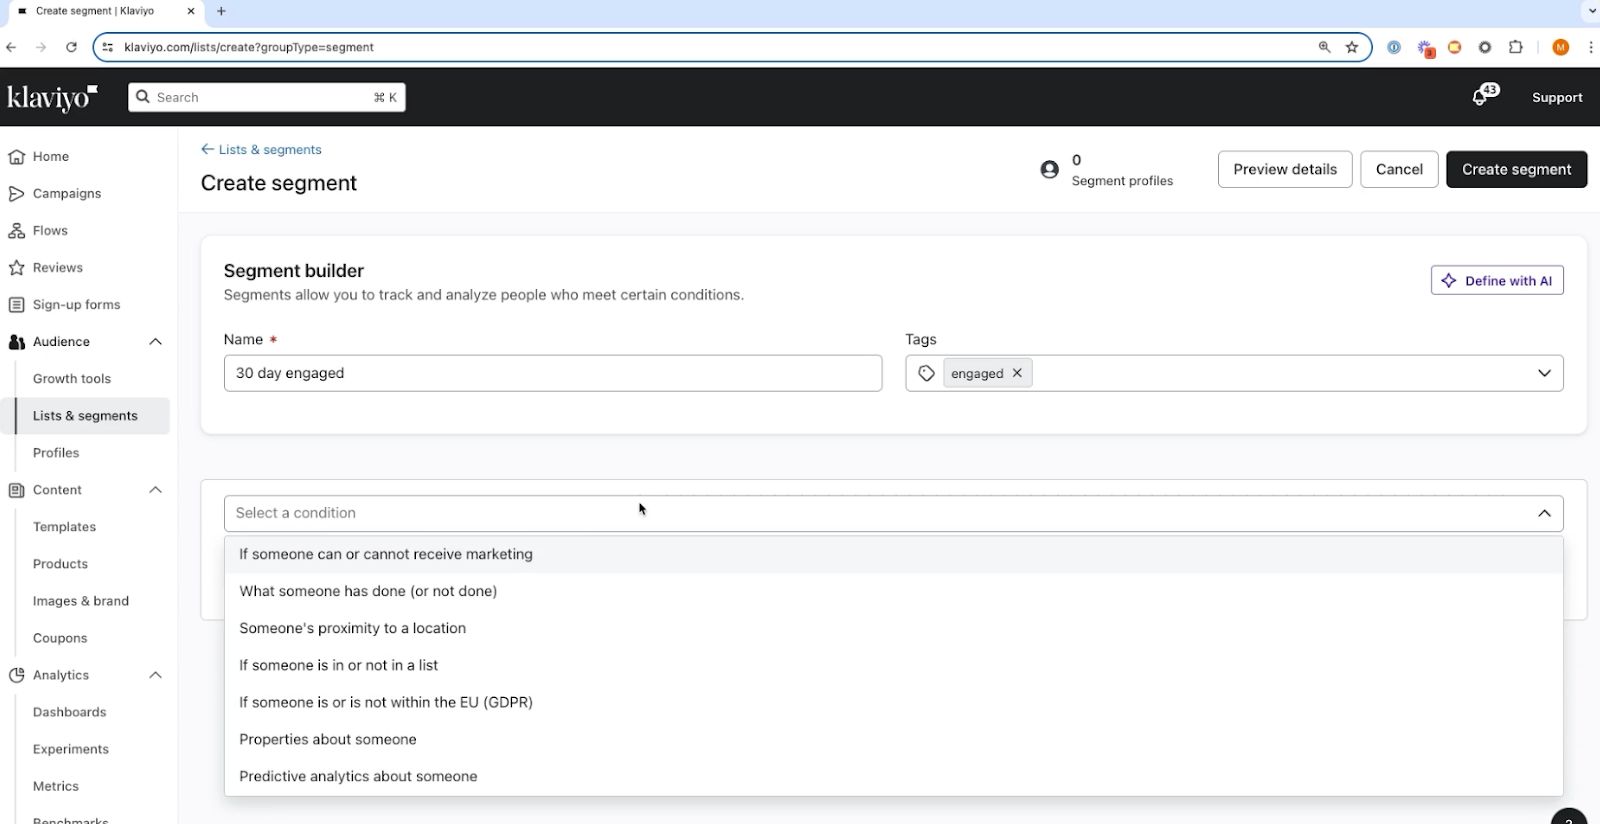
- Select the "Alia poll answered" event. Filter by the specific answer (e.g., Answer equals "Red").
You can now send highly targeted campaigns to this segment, knowing exactly what they are interested in.
Measuring Success: Analytics and Performance Tracking
Proper analytics setup is crucial for understanding your popup performance and optimizing for better results.
While Klaviyo provides basic signup tracking, Alia offers comprehensive analytics that connect popup performance directly to revenue outcomes. This deeper visibility allows for data-driven optimization decisions that compound over time.
Popup Strategy & Performance Matrix
Best for B2B or brands requiring high customer education.
The "Alia" Advantage: While Klaviyo handles the basic "who joined," using Alia allows you to see where they came from and why they converted, which is essential for scaling mystery or dollar-off discounts.
Focus on Perception: If you find your Revenue Attribution is low, testing a Fixed Dollar amount against a Percentage discount is the fastest way to increase perceived value.
Exit-Intent Optimization: Use Free Shipping as your primary A/B test variant for users who haven't engaged with your primary opt-in by the time they reach the "Bounce" threshold.
Setting Up Revenue Attribution
Revenue attribution connects popup signups directly to purchase behavior, providing clear ROI visibility that justifies your popup investment. Alia automatically tracks this attribution through Shopify integration.
What to look for:
- Immediate Purchase Rate: The percentage of users who buy within the same session after signing up.
- Welcome Flow Revenue: Monitor the revenue generated by the Welcome Series in Klaviyo. Since Alia sends higher-intent leads, you should see this metric rise. (Case study: Gardencup saw a 76% uplift in Welcome Flow revenue after switching to Alia.)
Troubleshooting Common Popup Issues
Even well-designed popups can encounter technical issues that impact performance and user experience. Understanding common problems and their solutions helps maintain optimal popup functionality.
Mobile Display and Responsiveness Problems
Issue: Popup appears cut off, text is too small, or the "X" close button is hard to tap on mobile devices. Klaviyo Solution: You often need to duplicate the form, set one to "Desktop Only" and one to "Mobile Only," and manually adjust font sizes and padding for the mobile version.
Alia Solution: Alia popups are mobile-optimized by default. The "floating button" style used by brands like Firebelly Tea ensures the experience is non-intrusive on small screens while still accessible.
Loading Speed and Performance Impact
Issue: Heavy popups with large images slow down page load times, hurting Core Web Vitals and SEO. Prevention:
- Compress all images before uploading (use tools like TinyPNG).
- Use SVG for logos and icons where possible.
- Alia Advantage: Alia is engineered to not slow down site performance or mobile responsiveness, ensuring your SEO scores remain healthy.
Integration and Data Sync Problems
Issue: Subscriber data isn't appearing in Klaviyo, or custom properties (like quiz answers) are missing. Resolution:
- Check API Keys: Ensure your Klaviyo Private API Key has full access permissions.
- Verify List ID: Make sure the popup is pointing to a valid List ID in Klaviyo.
- Test Live: Sign up with a real email address on your site and check the "Profiles" section in Klaviyo immediately to see if the data populates.
The "Popup Fatigue Paradox" Framework
Most popup advice focuses on reducing "popup fatigue," but our analysis of 1,000+ Shopify stores reveals a counterintuitive truth: the most successful brands actually show more popups, not fewer.
The key is the "Popup Fatigue Paradox"—visitors don't mind popups when they provide genuine value and feel integrated into the shopping experience rather than interrupting it.
The Three-Layer Popup Strategy
Instead of one generic popup, high-performing stores use a three-layer approach that serves different visitor types and intent levels. This framework challenges the conventional wisdom of "less is more" and instead focuses on "relevant is more."
Layer 1: The Welcome Mat (First-Time Visitors)
- Trigger: 30–50% scroll depth or 45+ seconds on site.
- Purpose: Brand introduction and basic email capture.
- Offer: Educational content (e.g., "Why our fabric is different") or a modest discount (5–10%).
- Success Metric: 8–15% opt-in rate.
Layer 2: The Interest Amplifier (Engaged Browsers)
- Trigger: Multiple page views or product page engagement.
- Purpose: Product education and purchase intent capture.
- Offer: Product-specific guides or larger discounts (15–20%) unlocked via a quiz.
- Success Metric: 15–25% opt-in rate.
Layer 3: The Exit Interceptor (High-Intent Abandoners)
- Trigger: Exit intent on product or cart pages.
- Purpose: Immediate conversion or future nurturing.
- Offer: Time-sensitive discounts or exclusive access.
- Success Metric: 20–35% opt-in rate.
The Value-First Popup Audit
Most popup audits focus on technical metrics like load times and mobile responsiveness, but the "Value-First Audit" examines whether each popup interaction genuinely helps the visitor accomplish their goals.
Audit Questions:
- Value Assessment: Does this popup help visitors discover products, learn about benefits, or solve problems?
- Timing Relevance: Does the popup appear when visitors are most likely to need this information?
- Content Depth: Does the popup provide enough information to make an informed decision?
- Action Clarity: Is the next step obvious and valuable to the visitor?
This framework explains why educational popups (like Alia's approach) consistently outperform discount-only popups—they provide genuine value that visitors appreciate rather than interrupting their browsing experience.
Stop Settling for 5% Opt-in Rates: Scale Your ROI with Alia-Powered Klaviyo Popups
Setting up a basic Klaviyo popup is a vital first step, but for scaling Shopify brands, "basic" often translates to missed revenue. When you move beyond generic forms and focus on smart triggers, mobile-first design, and interactive storytelling, you stop simply "collecting emails" and start building a high-conversion engine.
Final Checklist for Success:
- Respect the User: Use 50–70% scroll triggers or 8–15 second delays to engage visitors, not interrupt them.
- Optimize for Touch: Stick to 44x44px buttons and minimal form fields to keep mobile friction low.
- Value Over Discounts: Swap the "10% off" bribe for educational experiences that build trust and convert up to 3x better.
- Automate Growth: Use AI-driven optimization to eliminate the guesswork of manual A/B testing.
If you’re ready to evolve your strategy, the Alia + Klaviyo integration is the bridge between a simple signup and a sophisticated data-driven brand experience. Brands like Nakie and Firebelly Tea have already proven that replacing static popups with interactive lessons can drive triple-digit growth and millions in incremental sales.
Don't leave your list growth to chance—upgrade your capture strategy and start turning passive traffic into loyal, high-intent customers today.
Start your free trial with Alia today and see how AI-powered popups can transform your list growth.